Showing posts with label Tutorials. Show all posts

Tuesday, July 16, 2013

Makeup Tutorial ~ Gal Mama Moments

Hey gals! I filmed a makeup tutorial for you all. I did this while my sweet little one was helping, so there is an extra cute piece at the end of the video with her in it! She is just too damn cute, bwahaha.

Only a couple of gals actually asked for a tutorial, but I want to share with all my lovely readers. This what I am currently doing with my makeup. As my style and technique evolves, you should be able to see some different videos. :)

Enjoy!


Lots of Love,

Sunday, March 31, 2013

Concealer tutorial for red skin

Hello Gals! I recently made a tutorial for using concealer on very red skin that I hope you can find useful. I have rosacea, so my skin gets very red and horrible looking sometimes. :( When this happens, I must add 20 extra minutes to my makeup routine if I want to have a flawless foundation.

Here is my video - please give this a thumbs up on youtube!


Also, here are the before and after pictures!


There is such a huge difference when you can take the time to apply makeup properly. <3 p="">
Lots of Love,


Monday, March 4, 2013

Makeup Tutorial

Hey gals! I have done a makeup tutorial - its not very good, but it is my first! The lighting was really bright, so maybe next time I will try to film in the bathroom? Haha we shall see!

Anyway, here are some pictures of the finished product and then the video from CherryGalTV!


Wednesday, April 25, 2012

DIY high-low skirt

A really cute summer trend is the high low  skirt (or handkerchief skirt).

I read about it on Universal Doll and was immediately inspired to do a project! Honestly, it's so simple and easy, ANYONE can do this.


Check out a reference image of several popular gal brands doing the high low look:


So let's make our own! You will need a long maxi skirt and some scissors.


Spread the skirt out, and cut out a large triangle. You can go up as high or keep it as low as you want - you will just need to adjust the angle accordingly. I chose the keep mine a bit low and just show ankles and shoes. :)


Here is what it looks after you cut it and bring the skirt fabric back together.


And there you have it! Very simple!


I found a light weight tiered skirt at an outlet store, but you can get yours pretty much anywhere as this type of skirt is easy to come by! Try Target, or even your local thrift store. :)

If you do this project, I would love to see pictures of your finished project!


Tuesday, April 3, 2012

update your nails!

Updating your nails is fun and easy! You can do it at home with polish you already own, and jewels and charms that can be bought online (my fav is FullMoon Deco) or at a craft store like Michael's.


I started off with my nails at basic color, then added a top coat of Essie shattered pink diamond glitz. I finished by using a small drop of super glue to add a silver metal star stud.

Here are the polishes I used:

In a New York Color Minute - Manhattan
(248)
In a New York Color Minute - Park Ave
(246) 


Essie - shattered pink diamond glitz

Anytime you want to update your nails, don't waste money going to the salon often. Just look at what you have! Common household items (like toothpicks, hole reinforcements for binder paper, stamps) can be used to make nail designs if you're feeling creative. ^_^

Thursday, January 5, 2012

How to Dye Hair Extensions - Tutorial

I love to change my hair color! It's something fun and easy to change your whole look. If you've bought hair extensions (which can sometimes be expensive) you might feel stuck. After all, if you dye your hair then your extension won't match
If you have human hair extensions (and they haven't been treated to be un-dyeable) then you can consider dyeing your extensions to match. Usually only 3 shades in either direction (lighter or darker) is recommended so it doesn't damage the hair too much. 

I decided to try bleaching an old set of extensions to match my current hair, and here's how it turned out...

How to dye human hair extensions:
What you need:
Bleach or dye
Dye gloves and old clothing to wear
Paper towels to clean up any spills
Bowl and Brush
Two large plastic bags
Hot towel from dryer
Heavy item (such as a large book)
Flat work surface
Clear sink and an extra towel for drying

Step 1.  Prepare your work surface by spreading out one of the bags. This is where you will lay your hair and apply the bleach or dye. Have hair extensions laid out and brushed/clean nearby. Throw your towel in dryer so it can get nice and hot.

Step 2. Put on your gloves and mix up your dye or bleach. Make sure you have on old clothes that you wouldn't mind getting dye on and keep paper towels nearby just in case.

Step 3. Lay out flat your first piece of hair. While hold the top of the extensions, use your brush to apply the bleach in downward strokes (much like you would do on your own hair). Be sure to thoroughly saturate and evenly coat your hair.


Step 4. Lay down your next piece on top and repeat the same process of applying bleach as you did in step 3.

  
Step 5. Do this until all your extensions are coated in bleach.

Step 6. Cover with second plastic bag.


Step 6. Cover with hot towel from dryer and put a book or a heavy flat item on top.


Step 7. Leave under for 10 minutes, then check to see if your hair has reached the desired color. If it's not ready yet, leave in dye and check every five minutes until the color you want has been acheived.

Step 8. With gloves still on, take your hair to the sink to rinse in cool water. Take each piece and hold the extension at the top as you run cool water through the hair. Use your finger to massage the dye out from the hair or the top of the extensions. Lay on a dry surface when finished rinsing each piece.

Step 9. Once all extensions are completely rinsed clear of dye, pat dry with a towel and then allow to air dry.

Step 10. When your extensions are dry, gently brush and wear as usual. VIOLA!


I hope this is useful for someone out there! This was quite fun to do on a day off. Have you ever tried to dye extensions before? Any steps you would add? Let's hear it! :)

Friday, January 28, 2011

Deco Madness and Tips

What have I been up to these last 10 days? Well, sorry for not blogging more often (I'm sure you've heard that line before), but I promise I've got good stuff for you guys to read now! ^_^ Quality, not quantity, right? I've been very busy with starting school, but mostly I've been toiling over jewels and charms. Specifically for my phone!

Here we can see my old phone on the right versus my new phone cover on the left.


For the one on the right (my old one and first attempt at deco), I used stick n' seal glue and then switched to super glue. I used 5mm jewels bought at a Michael's craft store along with some charms I found in their button section. Not bad for a first try, I think.

For the one on the right (my new one), I used stick n' seal only for the large pieces and super glue for the jewels. I used 2mm jewels and charms I bought from Yuki. (Hint - she ships from Japan to US, and sells GAL mags, just sayin'.)

My old phone looks sloppy in my opinion. I actually screwed up quite a few times, so I ended up gluing jewels on top of other jewels to cover it up. Oh, such a heavy phone case because of that. @_@

For my new one, I was super careful. Not only that, but I knew what I was getting myself into and had learned many valuable lessons from my previous phone deco adventure.

Here is what I learned:
*For large parts, use a very strong glue. Super glue will not cut cut it.
*For smaller, detailed work, use a glue that doesn't dry too quickly. I used super glue, but epoxy would hold better. You will need to move and adjust as you go.
*Use tweezers - touch the tip to the glue (just so that a very tiny amount is on the pointy tip of one side of your tweezers) and use it to pick up and place jewels. It will stick to the tip, but once you place it in the glue on your surface, it will detach from the tip of your tweezer. I've tried special jewel sticks, manicure sticks... it just didn't work well.
*Lay out your large parts first and glue them down. Then glue the jewels around them.
*Be patient! My first phone only took me a couple of hours, but my second case took me several nights... probably 8-10 hours total. Its worth the wait!

What handy tricks have you discovered while deco-ing?

Tuesday, September 14, 2010

Bento Box - Mini Tutorial - Pic Heavy

Bento Box lunches are so cute and fun to eat! I tried my hand at creating a meal that was pleasing to the eye and the palette. Here is the account of my cooking adventure!

There is a Super H Mart right next to my office, so my first trip was there! Here is a list of what I bought (totaled about $40):

Sushi Rice
Cherry Tomatoes
Purple Yam
Green Beans
Broccoli
Mini Cucumber
Soy Bean Sprouts
Carrots
Hot Dogs
Thin Pork Cutlets
Pork Dumplings
Mirin
Tonkatsu Sauce
Panko
Furikake

Shopping for ingredients was lots of fun! Now lets get to the cooking part. Let me start off by saying that making all this was harder and took much longer than I thought it would. But... practice makes perfect, right? ^_^

First thing I did was cook my rice in a rice cooker. I added a dash of the Mirin for flavor.


Next, I took my vegetables and cut them into interesting shapes. I tried to make some smiley faces and bunnies to make my Bento Box kawaii. ;)


After that, I took my purple yam and cut it in half. One half got peeled, boiled, and then mashed with some honey and cream. This mash will be used for your Onigiri (rice balls). The other half got sliced and set aside for tempura.


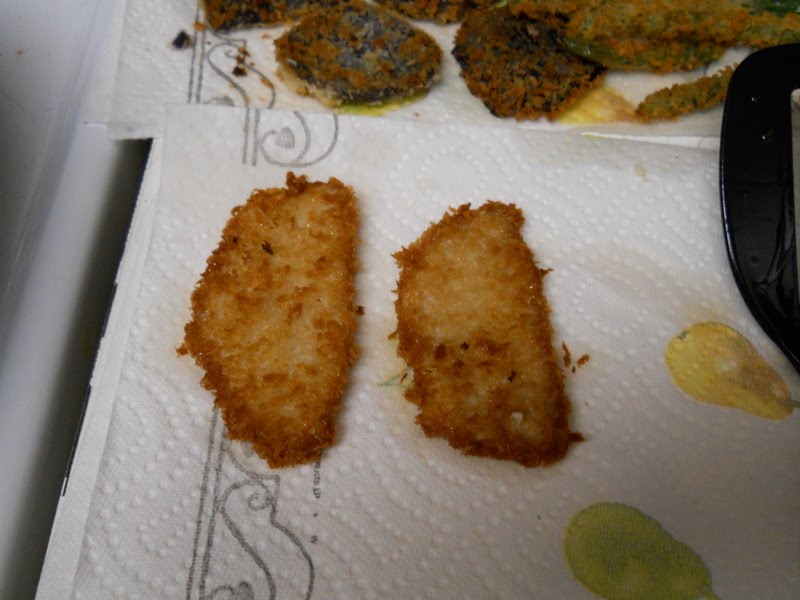
Next I prepared my green beans, yam slices, and pork for tempura. First, you will dip your food in batter (one cup cold water, one cup flour, one egg). Second, you will roll your food around in the Panko. Lastly, cook in a pan with a few tablespoons of oil until golden brown.


Next you will make your Onigiri. You will need a bowl of warm salt water nearby. Dip your hands in the water and pick up some rice. Make a small pocket and put about a tablespoon of filling in the rice. Close the rice over and shape with your hands into a triangle or any shape you want!


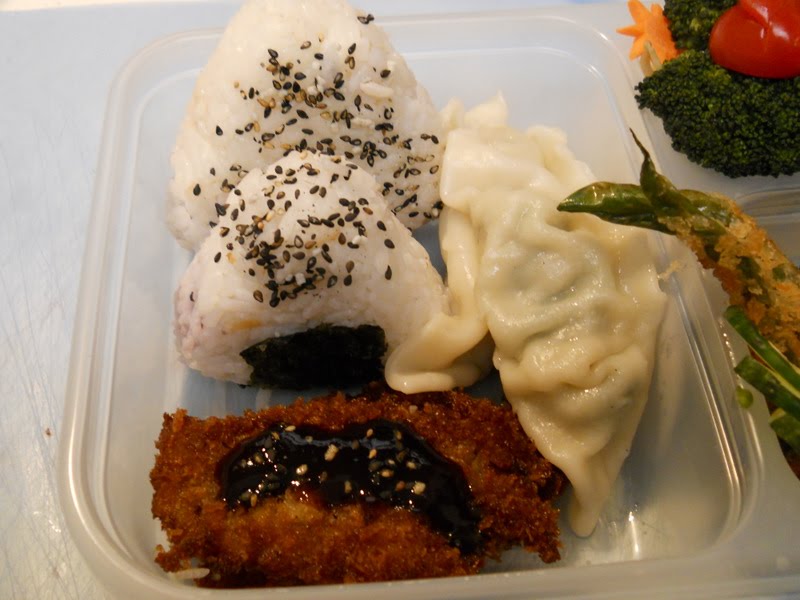
Then, you will sprinkle your Furikake (rice seasoning) on the rice. I used soy sauce to dip my hands in, and then cooked one Onigiri in the pan for a bit to try something different (the middle brown one). Also, you can see the purple yam in the bottom one.


After all this, don't forget to steam your dumplings!
Next it's time to put it all together. I tried to make it look as cute as possible. Be creative and rearrange your Bento Box to your liking!


And finally the finished product! Not too bad for a first time, eh? Ha ha, I had no idea what I was doing, so this took me several hours! It was fun, and the Onigiri was especially good.

I didn't have a real Bento Box, so I just used a divided food storage container. I will be on the look out for some cute Bento Boxes on ebay! :)

Does anyone else have experience with Japanese cooking? Any suggestions or recipes you could share would be super helpful!